How to Use Image Stitching Online: Step-by-Step Tutorial
This walkthrough uses the image stitching online tool on our homepage. Pick a template, add photos to each slot, fine-tune cells and global options, then preview and download—all in your browser.
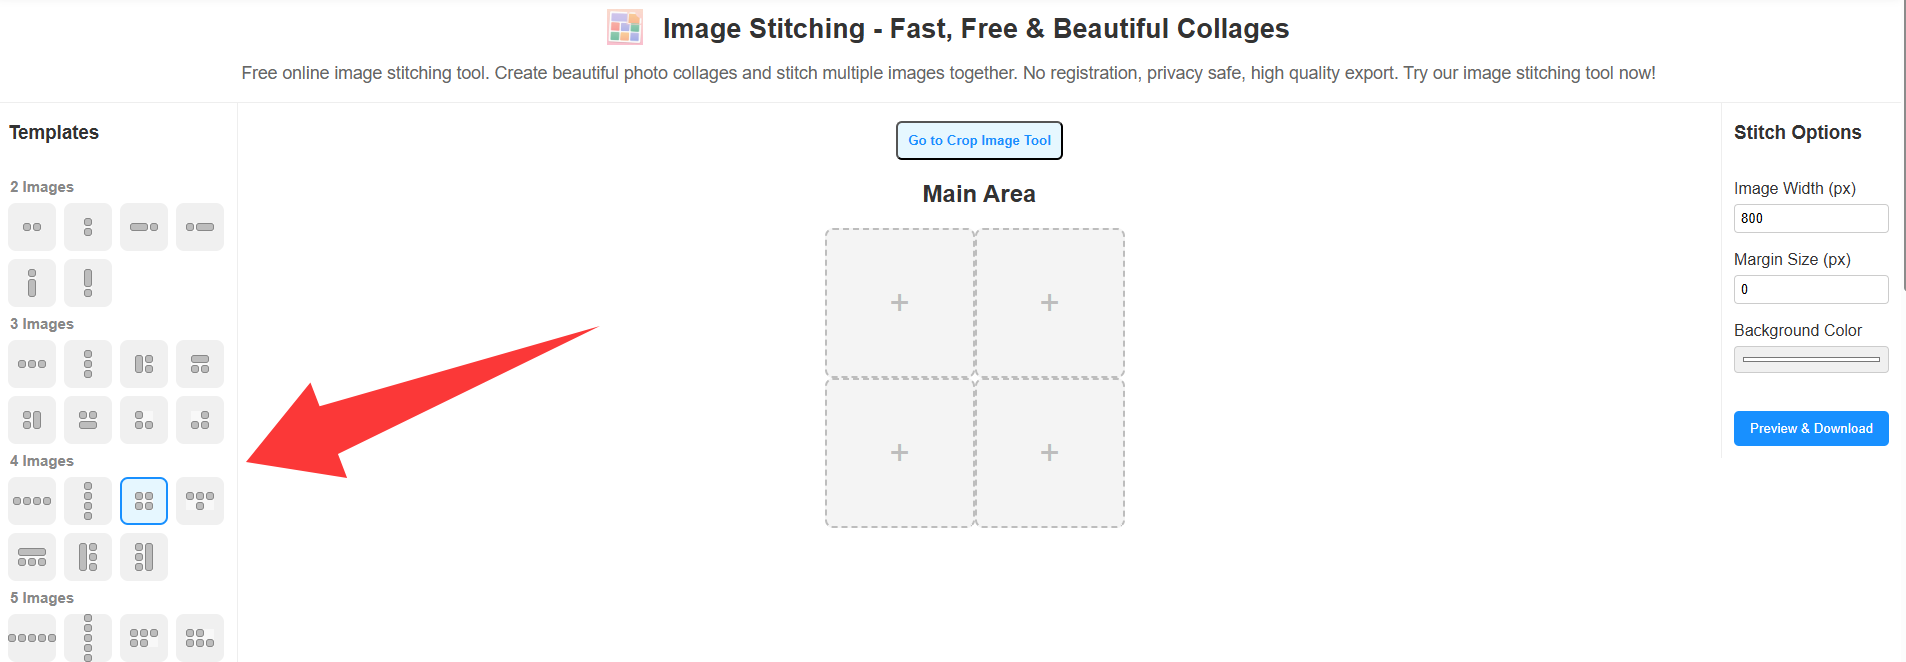
1. Choose a template
Open Image Stitching (homepage). In the left Templates panel, layouts are grouped by how many photos they use (2 Images, 3 Images, 4 Images, …). Click a thumbnail to select it—the dashed outline in the Main Area updates to match. The Stitch Options panel on the right controls overall width, spacing between cells, and background color.
For a fully free-form canvas (drag images anywhere, resize freely), use the Collage Maker instead.
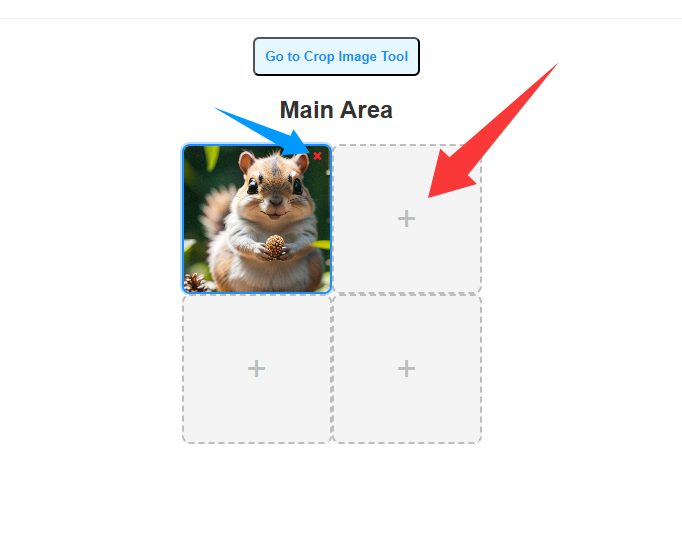
2. Add photos to each slot
In the Main Area, click the + inside a dashed cell to choose a file, or drag and drop an image onto a cell. The active cell shows a blue border. To remove a photo from a cell without changing the template, click the small red × on that image.
3. Select a cell to edit
Click a filled cell to make it the current selection (blue border). The right sidebar then shows Edit Current Image below Stitch Options—those sliders apply only to the selected cell.
Tip: To crop or resize source photos before stitching, use Crop Image (also linked above the Main Area).
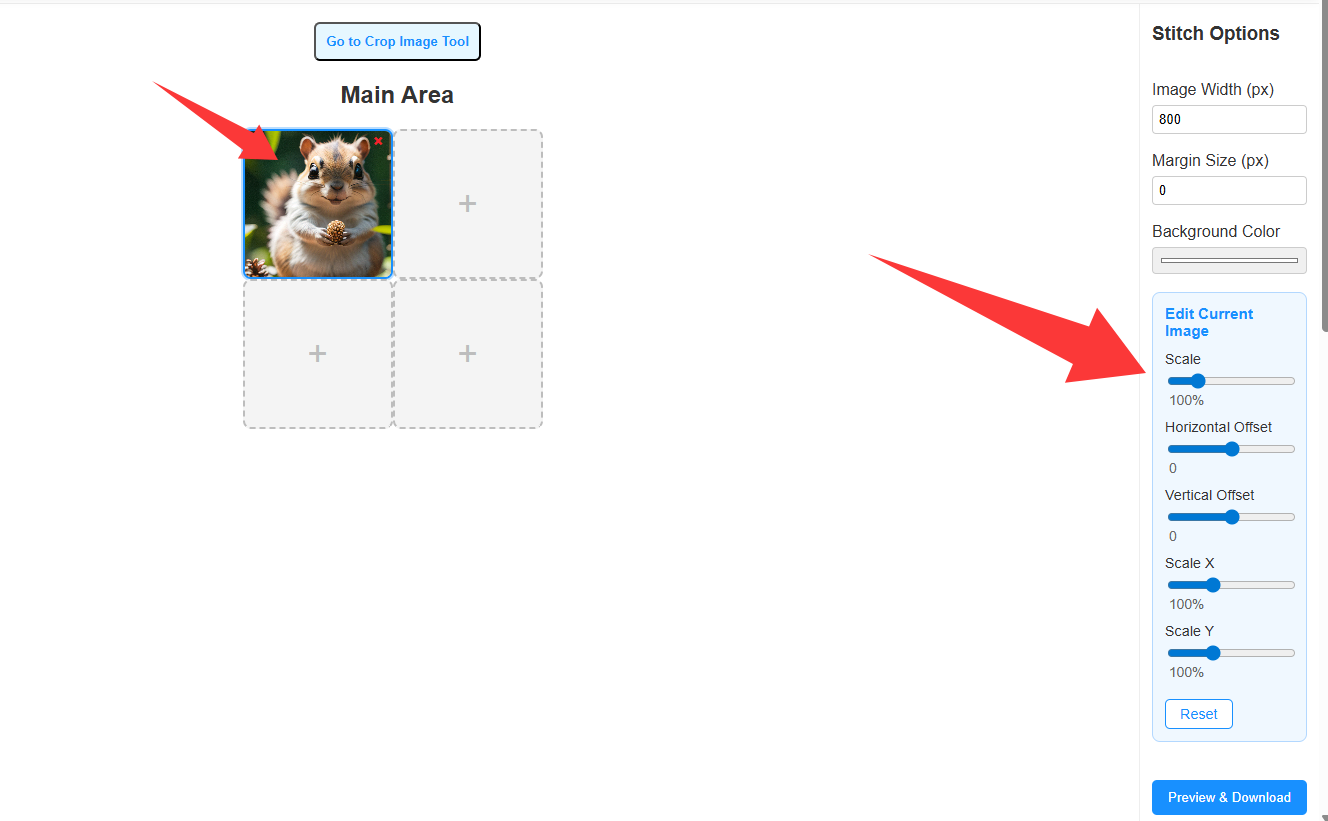
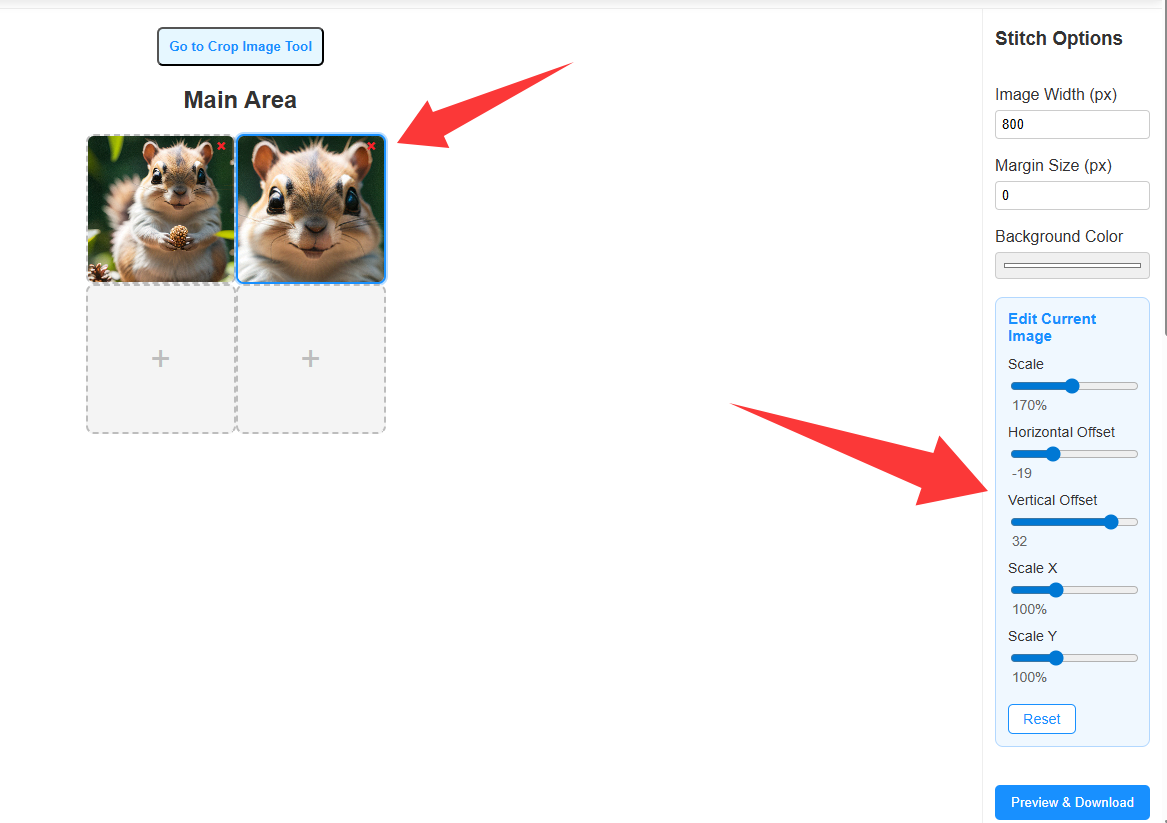
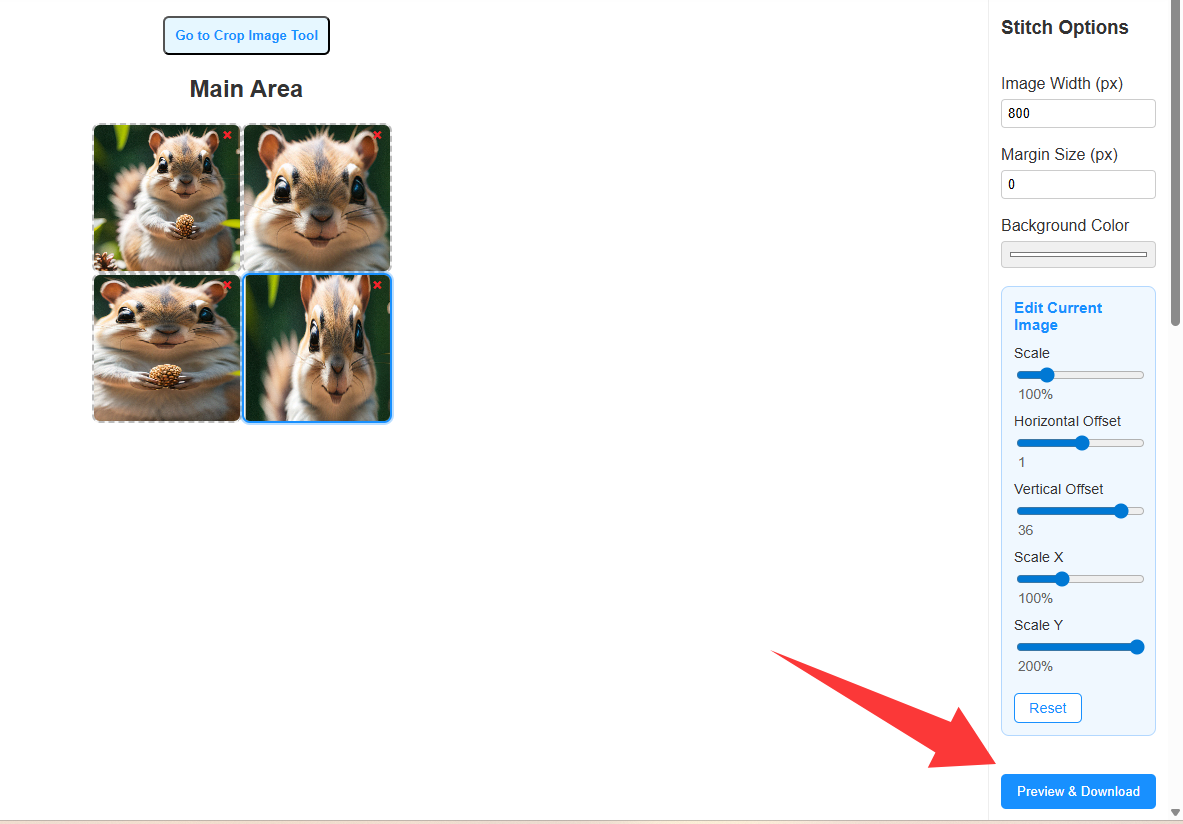
4. Adjust the image inside the cell
Use Scale to zoom the photo inside its frame. Horizontal Offset and Vertical Offset shift the image within the cell. Scale X and Scale Y change width and height independently when you need a non-uniform fit. Reset clears edits for the current cell only.
5. Set overall width, margin, and background
Image Width (px) sets the total width of the stitched canvas; each cell shares that space according to the template. Margin Size (px) adds space between cells—try small values like 4–12 px for a tidy grid. Background Color fills gaps between cells and the outer margin when margin is greater than zero.
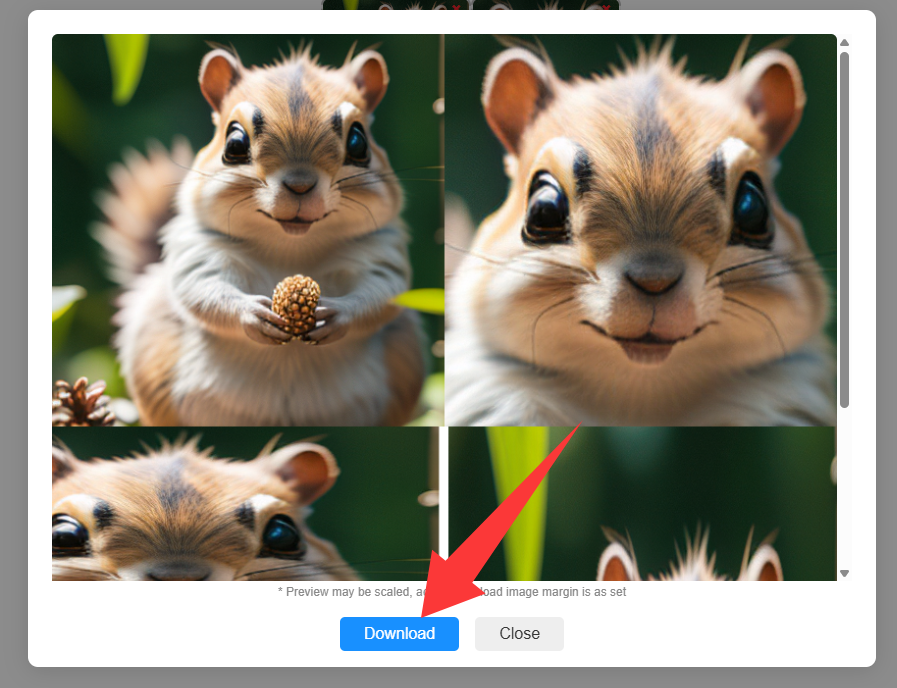
6. Preview and download
Click Preview & Download. A modal shows a preview of your collage; the note under the preview explains that the preview may be scaled while the downloaded PNG uses your exact margin settings. Click Download to save the PNG, or Close to return and keep editing.
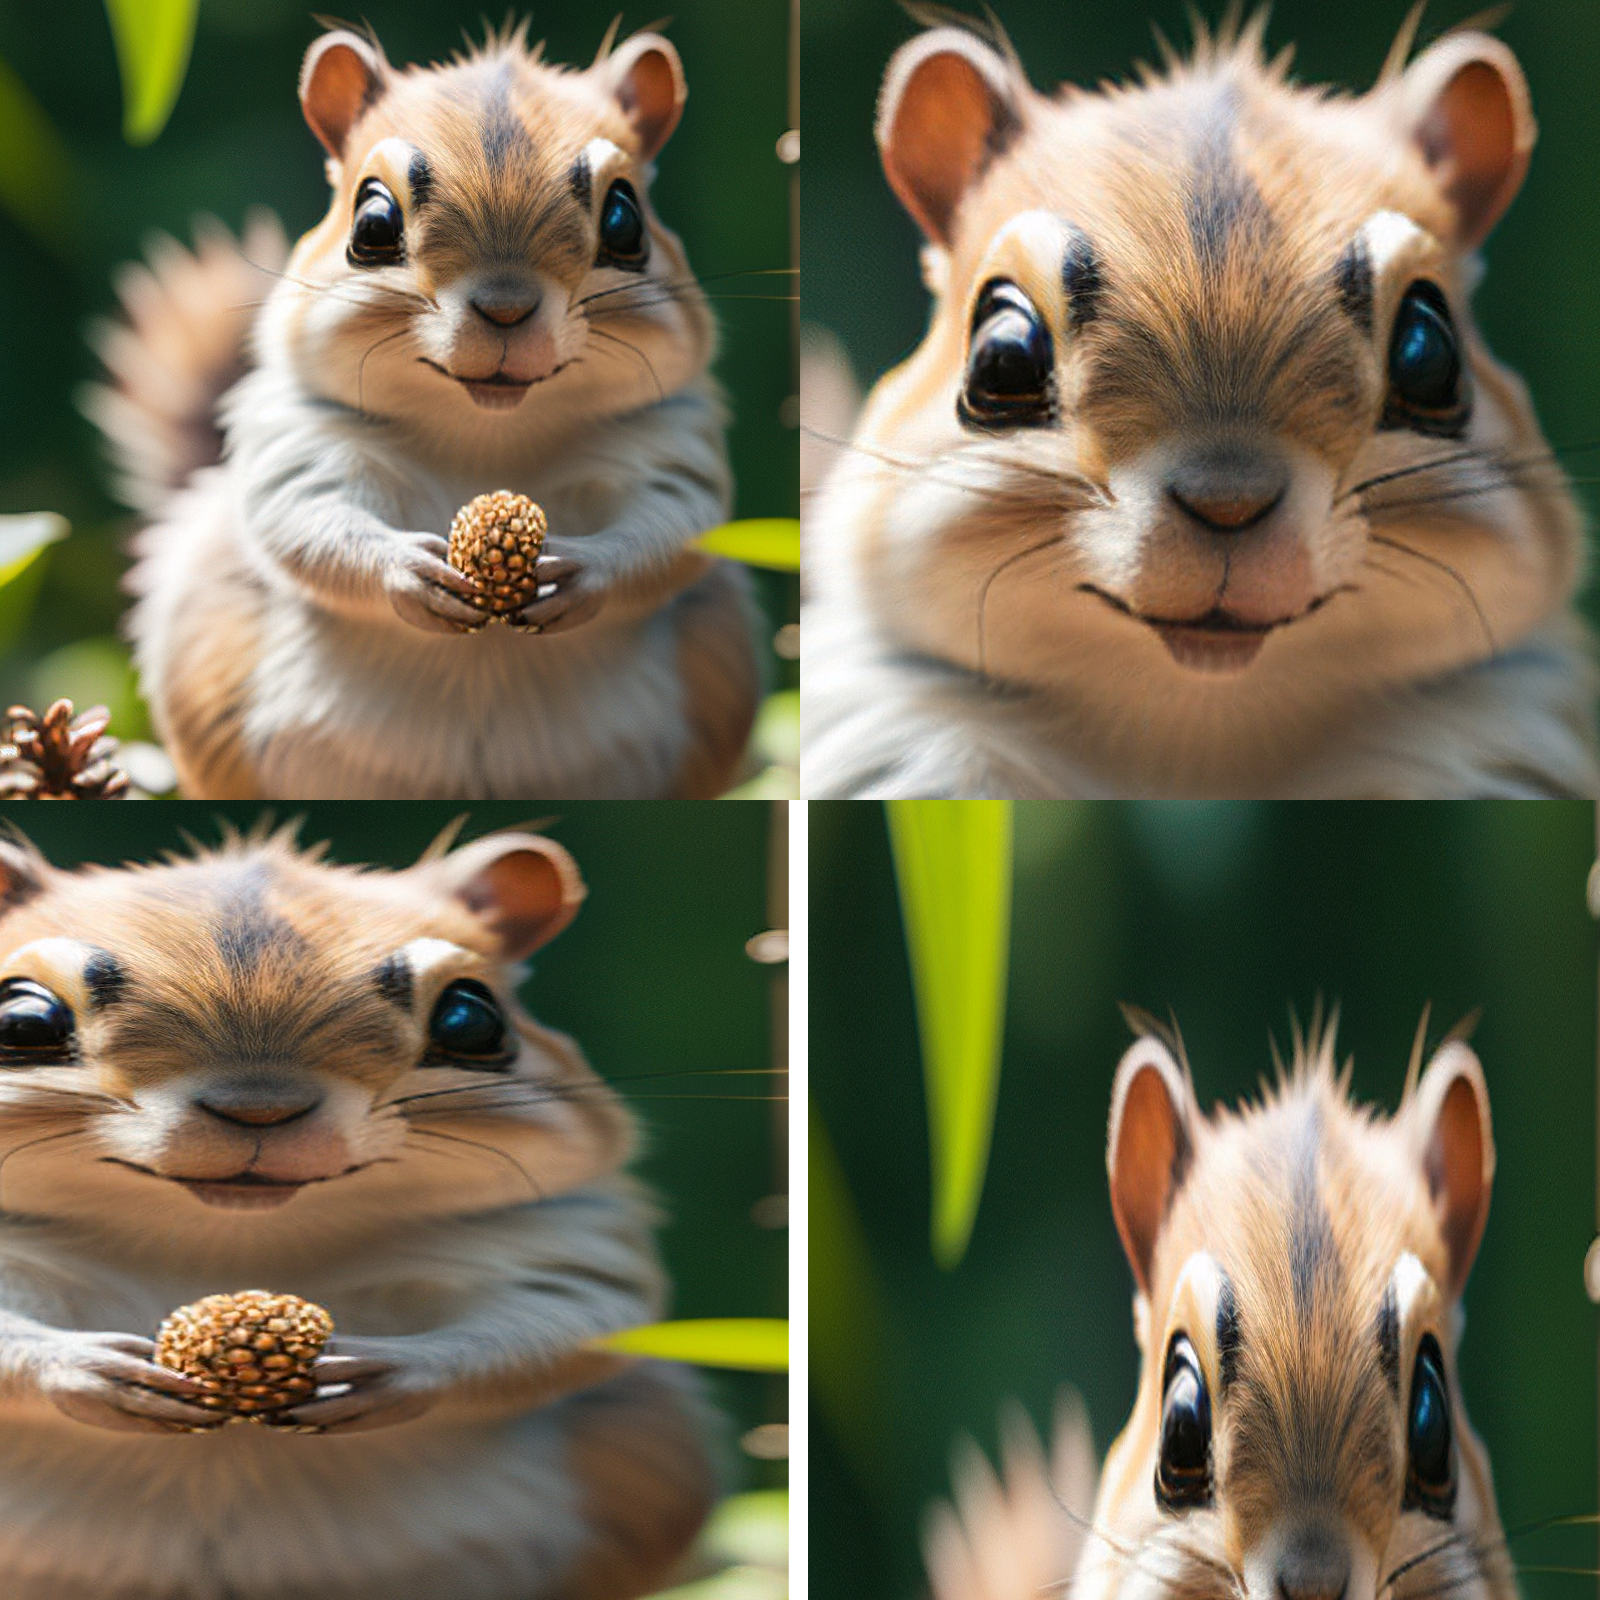
7. Exported result
The file you download is a single PNG of the full grid—margins and background match what you set in Stitch Options. All processing runs locally in your browser; your photos are not uploaded to our servers.
Open Image Stitching Online